

The Perfect Oven-Baked Chex Mix – So Easy!
Introduction
There’s something truly special about the aroma of Chex Mix baking in the oven. This iconic snack has been a favorite at parties, game nights, and casual gatherings for decades. Whether you’re a long-time fan or new to the world of Chex Mix, this blog post will guide you through creating the perfect batch of this addictive treat right in your own kitchen. We’ll explore the classic Chex Mix recipe oven method, along with some exciting variations and tips to make your snack mix truly unforgettable.
The History of Chex Mix
Before we dive into the recipe, let’s take a moment to appreciate the rich history of this beloved snack. Chex Mix has its roots in the 1950s when Ralston Purina first introduced Chex cereal. The idea of using the cereal as a base for a savory snack mix quickly caught on, and by the 1960s, Chex Mix had become a household name.
Initially, the recipe was shared on cereal boxes, encouraging home cooks to create their own mixes. The original recipe featured Chex cereal, nuts, pretzels, and a savory seasoning blend. Over the years, countless variations have emerged, but the classic oven-baked method remains a favorite for its ability to create perfectly crispy, flavorful results.
Why Choose the Oven Method?
While microwave recipes for Chex Mix exist, the oven-baked version is often preferred for several reasons:
- Even cooking: The oven provides consistent heat, ensuring that all ingredients are evenly toasted and seasoned.
- Better texture: Oven-baking allows for a crispier, more satisfying crunch.
- Larger batches: You can make bigger portions in the oven, perfect for parties or storing for later.
- Enhanced flavor: The slower cooking process in the oven allows the seasonings to better penetrate the ingredients.
Now that we understand why the Chex Mix recipe oven method is superior, let’s get into the details of how to make this delicious snack.
Chex Mix Recipe: Oven-Baked Perfection
Equipment
- Large Bowl
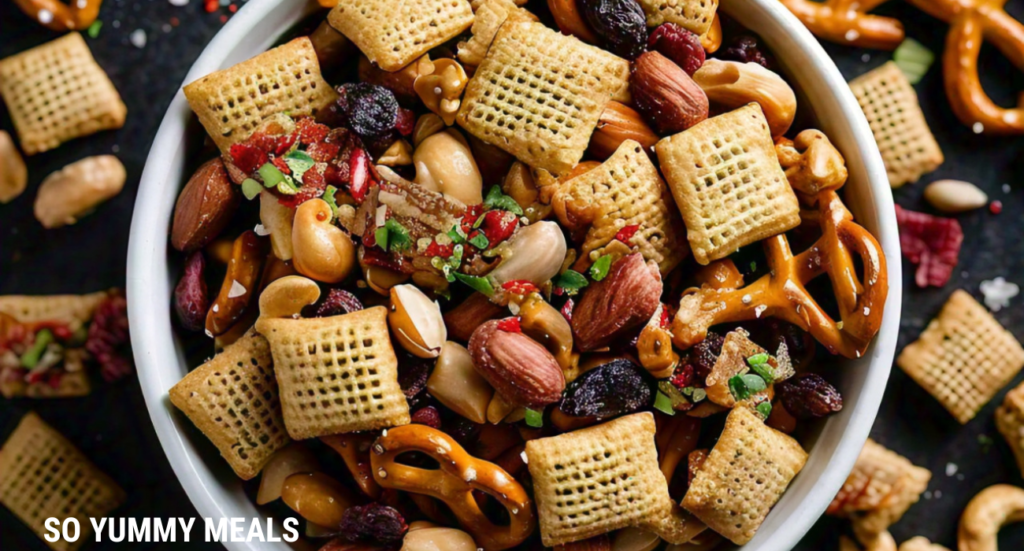
Ingredients
- 3 cups Corn Chex cereal
- 3 cups Rice Chex cereal
- 3 cups Wheat Chex cereal
- 1 cup mixed nuts
- 1 cup bite-sized pretzels
- 1 cup garlic-flavored bite-sized bagel chips or regular bagel chips
- 6 tablespoons butter
- 2 tablespoons Worcestershire sauce
- 1 1/2 teaspoons seasoned salt
- 3/4 teaspoon garlic powder
- 1/2 teaspoon onion powder
Instructions
- Preheat your oven to 250°F (120°C). This low temperature is key for slowly toasting the mix without burning it.
- In a large bowl, combine the Corn Chex, Rice Chex, and Wheat Chex cereals. Add the mixed nuts, pretzels, and bagel chips. Gently mix these dry ingredients, being careful not to crush the cereal.
- In a small microwave-safe bowl, melt the butter. This should take about 30 seconds in the microwave. Once melted, stir in the Worcestershire sauce, seasoned salt, garlic powder, and onion powder until well combined.
- Pour the butter mixture over the cereal mixture in the large bowl. Use a large spoon or your hands (if the mixture is cool enough) to toss and coat all the ingredients evenly with the seasoning.
- Spread the mixture in an even layer on a large baking sheet. If you don't have a large enough sheet, you can use two smaller ones.
- Bake in the preheated oven for 1 hour, stirring every 15 minutes. This frequent stirring is crucial for even toasting and to prevent burning.
- After an hour, remove the baking sheet from the oven and let the Chex Mix cool completely. As it cools, it will continue to crisp up.
- Once cooled, store your homemade Chex Mix in an airtight container. It should stay fresh for up to two weeks, though it rarely lasts that long!
Notes
Tips for Perfect Oven-Baked Chex Mix
To ensure your Chex Mix recipe oven adventure is a success, keep these tips in mind:1. Don’t Overcrowd the Pan
Spread the mixture in a single layer on your baking sheet. If it’s too crowded, the ingredients won’t toast evenly. Use multiple baking sheets if necessary, rotating them in the oven halfway through cooking.2. Stir Consistently
Remember to stir the mix every 15 minutes. This not only prevents burning but also helps distribute the seasoning evenly as it bakes.3. Cool Completely Before Storing
Allow your Chex Mix to cool entirely before transferring it to a storage container. This step is crucial for maintaining that perfect crunch.4. Experiment with Seasonings
While the classic recipe is delicious, don’t be afraid to play with different spice combinations. Try adding a pinch of cayenne for heat or some ranch seasoning for a tangy twist.5. Choose Quality Ingredients
The better your base ingredients, the tastier your final product will be. Opt for fresh nuts and newly opened cereal boxes for the best results.Nutrition
Variations on the Classic Chex Mix Recipe Oven Method
One of the best things about Chex Mix is its versatility. Here are some exciting variations to try:
Sweet and Spicy Chex Mix
Add a kick to your mix with this sweet and spicy version:
- Follow the classic recipe, but add 1/2 teaspoon of cayenne pepper to the seasoning mix.
- After baking, toss the cooled mix with 1 cup of M&Ms or chocolate chips for a sweet contrast.
Peanut Butter Lover’s Chex Mix
For peanut butter fans, try this indulgent twist:
- Replace half the butter with 1/3 cup of peanut butter in the seasoning mixture.
- Add 1 cup of peanut butter chips to the dry ingredients.
- After baking, toss in 1 cup of chocolate-covered peanuts.
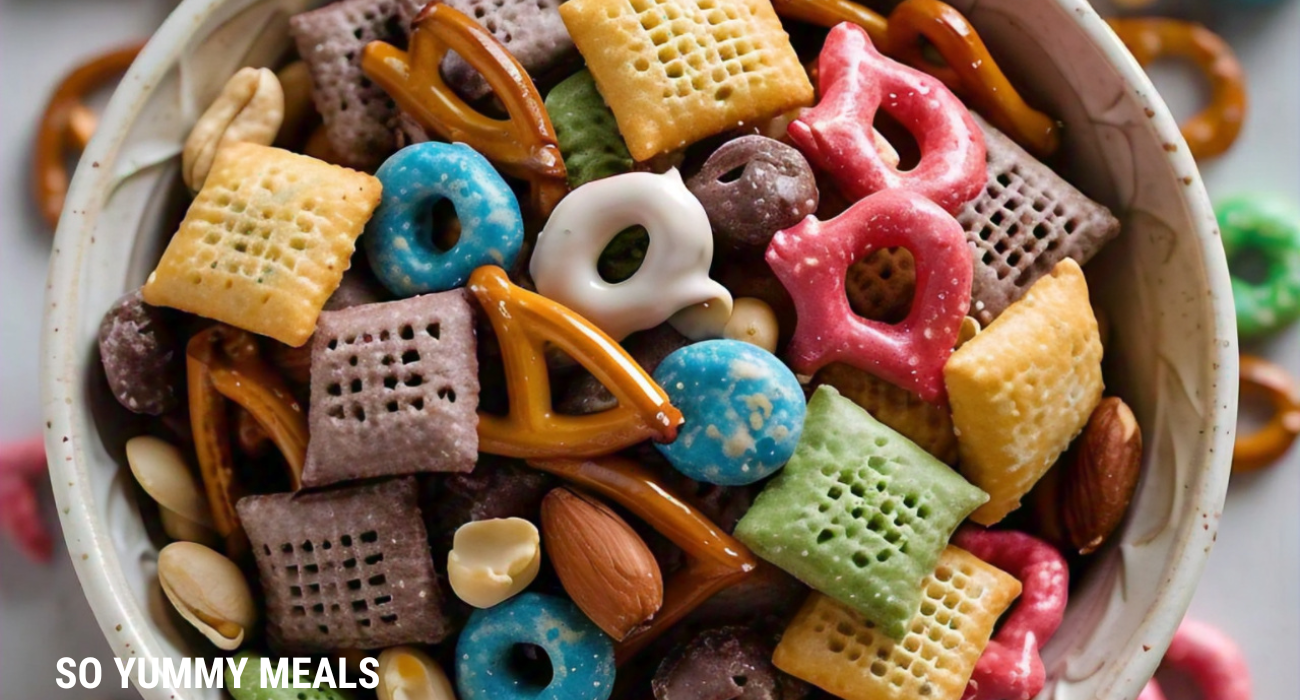
Holiday Chex Mix
Create a festive version perfect for gift-giving:
- Add 1 teaspoon of cinnamon and 1/4 teaspoon of nutmeg to the seasoning mix.
- Include 1 cup each of red and green M&Ms and 1 cup of dried cranberries after baking.
Savory Herb Chex Mix
For an elevated, gourmet touch:
- Add 1 tablespoon of fresh rosemary and 1 tablespoon of fresh thyme (both finely chopped) to the seasoning mix.
- Include 1 cup of grated Parmesan cheese in the last 15 minutes of baking.
The Nutritional Side of Chex Mix
While Chex Mix is undoubtedly a treat, it can be part of a balanced diet when enjoyed in moderation. Here’s a quick look at what you’re getting in a typical serving:
- Calories: A 1/2 cup serving of homemade Chex Mix contains approximately 140-160 calories.
- Protein: Thanks to the nuts and cereals, you’ll get about 3-4 grams of protein per serving.
- Fiber: The whole grain cereals provide about 2 grams of fiber per serving.
- Vitamins and Minerals: Chex cereals are often fortified with essential vitamins and minerals.
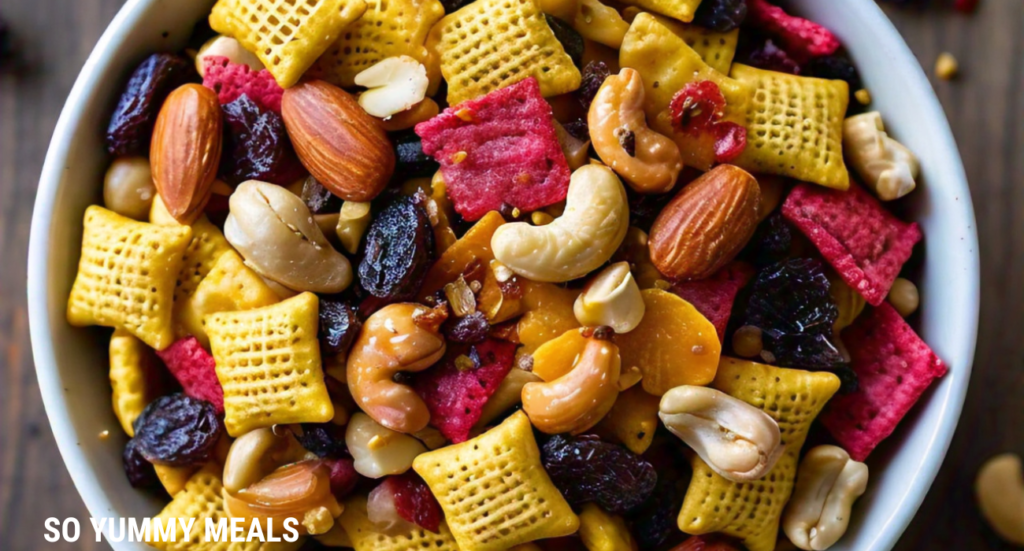
To make your Chex Mix a bit healthier, consider these modifications:
- Use low-sodium pretzels and unsalted nuts to reduce the overall salt content.
- Swap out some of the butter for olive oil to incorporate heart-healthy fats.
- Add more nuts for extra protein and healthy fats.
- Include dried fruits for natural sweetness and added nutrients.
Storing and Serving Your Homemade Chex Mix
Now that you’ve mastered the Chex Mix recipe oven method, let’s talk about how to store and serve your creation:
Storage Tips
- Cool Completely: As mentioned earlier, make sure your Chex Mix is entirely cool before storing to prevent soggy results.
- Airtight Container: Store in an airtight container or resealable plastic bag to maintain freshness.
- Room Temperature: Keep your mix at room temperature; avoid refrigerating as this can make it soggy.
- Shelf Life: Properly stored, homemade Chex Mix can last up to two weeks.
Serving Suggestions
- Party Bowls: Serve in large bowls at parties or gatherings. Consider having a few bowls spread around for easy access.
- Individual Portions: For a more controlled serving size, offer Chex Mix in small paper cups or bags.
- Gift Giving: Package your homemade Chex Mix in decorative jars or bags for a thoughtful, edible gift.
- Pairing Ideas: Chex Mix pairs well with a variety of beverages. Try it with cold beer, lemonade, or even a crisp white wine for an unexpected combination.
Troubleshooting Common Chex Mix Issues
Even with the best recipes, sometimes things don’t go as planned. Here are solutions to common Chex Mix problems:
Too Salty
- Solution: If your mix turns out too salty, try adding more unseasoned cereal or pretzels to balance it out.
- Prevention: Start with less seasoned salt than the recipe calls for and adjust to taste.
Burnt Mix
- Solution: Unfortunately, burnt Chex Mix can’t be saved. You’ll need to start over.
- Prevention: Set a timer for each 15-minute stirring interval and watch closely in the last 15 minutes of baking.
Soggy Mix
- Solution: If your mix is soggy, spread it on a baking sheet and return it to a 250°F oven for 15-20 minutes, stirring occasionally.
- Prevention: Ensure you’re not overcoating the mix with butter and allow it to cool completely before storing.
Mastering the Chex Mix Recipe Oven Method
Creating the perfect batch of Chex Mix in your oven is both an art and a science. With the right ingredients, careful attention to baking time and temperature, and a willingness to experiment, you can create a snack that’s sure to become a favorite in your household.
Remember, the beauty of Chex Mix lies in its versatility. Don’t be afraid to get creative with your ingredients and seasonings. Whether you stick to the classic recipe or venture into new flavor territories, the oven-baked method will ensure a crispy, flavorful result every time.
So, preheat that oven, gather your ingredients, and get ready to fill your home with the irresistible aroma of freshly baked Chex Mix. Your taste buds (and your friends and family) will thank you!


You May Also Like
Fluffy Kodiak Pancakes in 10 Minutes – No Guilt!

Homemade Iced Tea: Refresh Your Summer!